In today’s digital era, delivering content efficiently is crucial for providing a seamless user experience. Amazon CloudFront, a content delivery network (CDN) service provided by Amazon Web Services (AWS), plays a pivotal role in optimising content delivery by distributing it globally through a network of edge locations. This blog will guide you through the process of configuring CloudFront for both static and dynamic content, ensuring optimal performance and enhanced user satisfaction.
Understanding Static and Dynamic Content
Static content refers to files that remain unchanged unless manually updated, such as images, stylesheets, and JavaScript files. On the other hand, dynamic content is generated on the fly, often in response to user requests, and can include personalised information, database queries, or application logic.
Benefits of using CloudFront for Content Delivery
- Global Reach: CloudFront has a vast network of edge locations globally, reducing latency and ensuring faster content delivery to users regardless of their geographical location.
- Security: CloudFront provides various security features, including DDoS protection, SSL/TLS encryption, and integration with AWS Web Application Firewall (WAF), ensuring the secure transmission of content.
- Cost Optimization: By offloading traffic to edge locations, CloudFront helps reduce the load on your origin server, leading to cost savings and improved performance.
Configuring CloudFront for Static Content
Step 1: Set Up S3 Bucket for Static Content:
- Create an S3 bucket to store your static content.
- Upload your static files (e.g., images, CSS, JS) to the S3 bucket.
Step 2: Create a CloudFront Distribution:
- Open the CloudFront console and click “Create Distribution.”
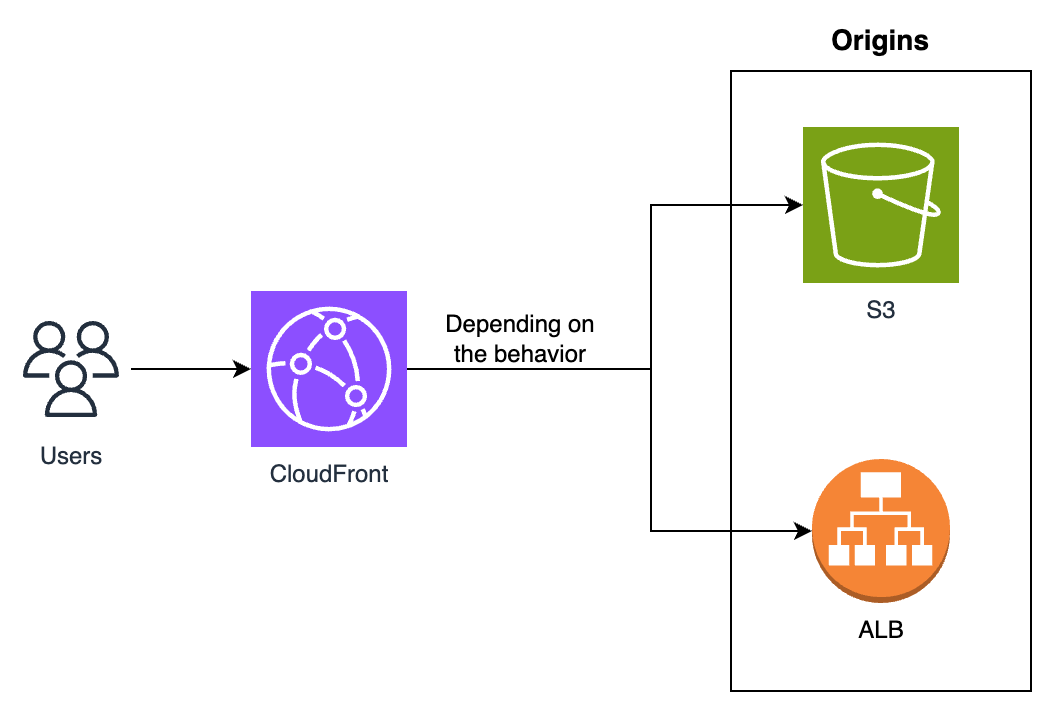
- Choose the S3 bucket as the origin for your distribution.
- Configure additional settings, such as default cache behaviour, distribution settings, and any desired restrictions or security measures.
- Click “Create Distribution” to deploy your CloudFront distribution.
Step 3: Update DNS Settings:
- Update your DNS settings to point to the CloudFront distribution domain name.
- CloudFront will now handle the distribution of your static content globally.
Configuring CloudFront for Dynamic Content:
Step 1: Set Up an Elastic Load Balancer (ELB) or API Gateway:
- Create an Elastic Load Balancer for dynamic web applications or an API Gateway for dynamic API content.
Step 2: Configure CloudFront for Dynamic Content:
- Open the CloudFront console and click “Create Distribution.” Choose the ELB or API Gateway as the origin for your distribution.
- Configure caching behaviour, TTL (Time-To-Live), and any necessary security measures.
- Click “Create Distribution” to deploy your CloudFront distribution for dynamic content.
Step 3: Update DNS Settings:
- Update your DNS settings to point to the CloudFront distribution domain name.
- CloudFront will now accelerate the delivery of your dynamic content globally.
Advanced Configuration Tips:
Custom SSL Certificates: Use custom SSL certificates to ensure secure communication between CloudFront and end-users.
Lambda@Edge: Leverage Lambda@Edge functions for real-time processing and customization of content at the edge locations.
WAF Integration: Integrate CloudFront with AWS WAF to protect against common web application security threats.
CloudFront Signed URLs and Cookies: Implement signed URLs or cookies to control access to your content and prevent unauthorised distribution.
Conclusion
Configuring Amazon CloudFront for both static and dynamic content is a crucial step in optimising content delivery, enhancing performance, and ensuring a seamless user experience. By following this comprehensive guide and leveraging advanced configuration options, you can harness the full potential of CloudFront and provide a fast, secure, and scalable content delivery solution for your applications.
To Get A Expert Solutions, You can connect us now