The Importance of SSL/TLS Certificates for OpenVPN
Securing your OpenVPN Access Server’s web interface with an SSL/TLS certificate is not just about keeping up with best practices; it’s essential for protecting your data and ensuring the privacy and security of your communications. Let’s Encrypt, a free, automated, and open Certificate Authority, offers an accessible path to secure your OpenVPN server. This blog post will guide you through the process of installing Let’s Encrypt certificates on your OpenVPN Access Server web interface, enhancing your server’s security posture.
Table Of Content
- Step 1: SSH and Install Certbot
- Step 2: DNS Configuration
- Step 3: Run Certbot
- Step 4: Apply the Certificate to OpenVPN
- Step 5: Restart OpenVPN Access Server
- Step 6: Verify the Installation
- Conclusion
The Importance of SSL/TLS Certificates for OpenVPN
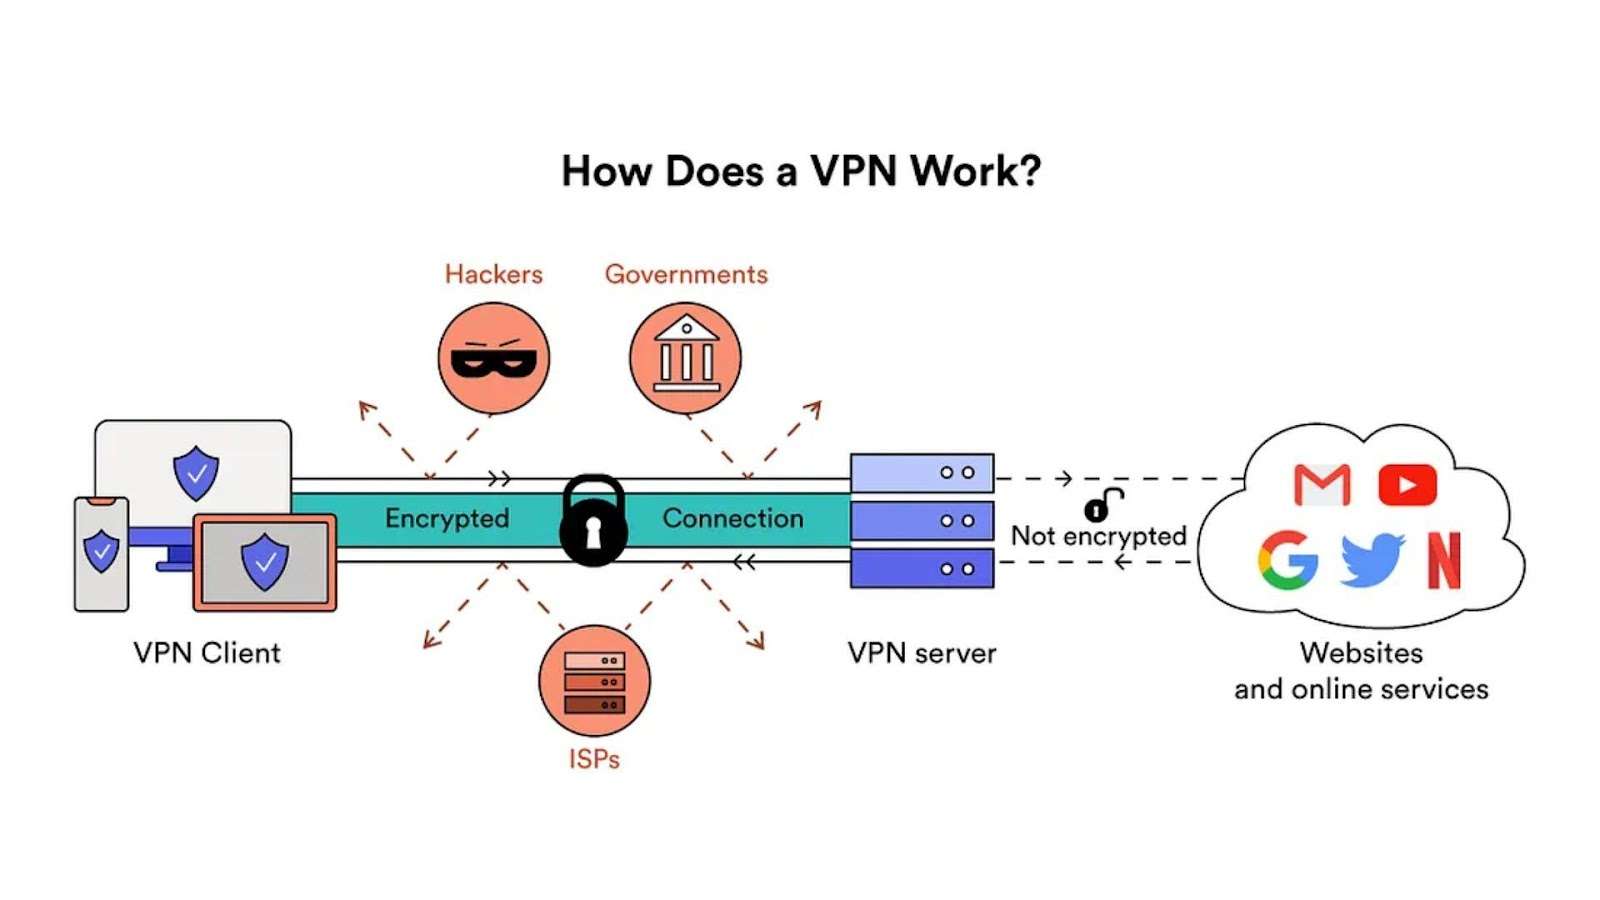
SSL/TLS certificates encrypt the data transmitted between your server and your users, safeguarding sensitive information from interception or tampering. For OpenVPN, this means securing administrative access and user connections, ensuring that only authorized users can access your VPN and that their data remains private and secure.
Step-by-Step Guide to Installing Let’s Encrypt Certificates
Step 1: SSH and Install Certbot
- SSH into your OpenVPN access server.
- Update your package lists and install Certbot:
| sudo apt update && sudo apt install certbot |
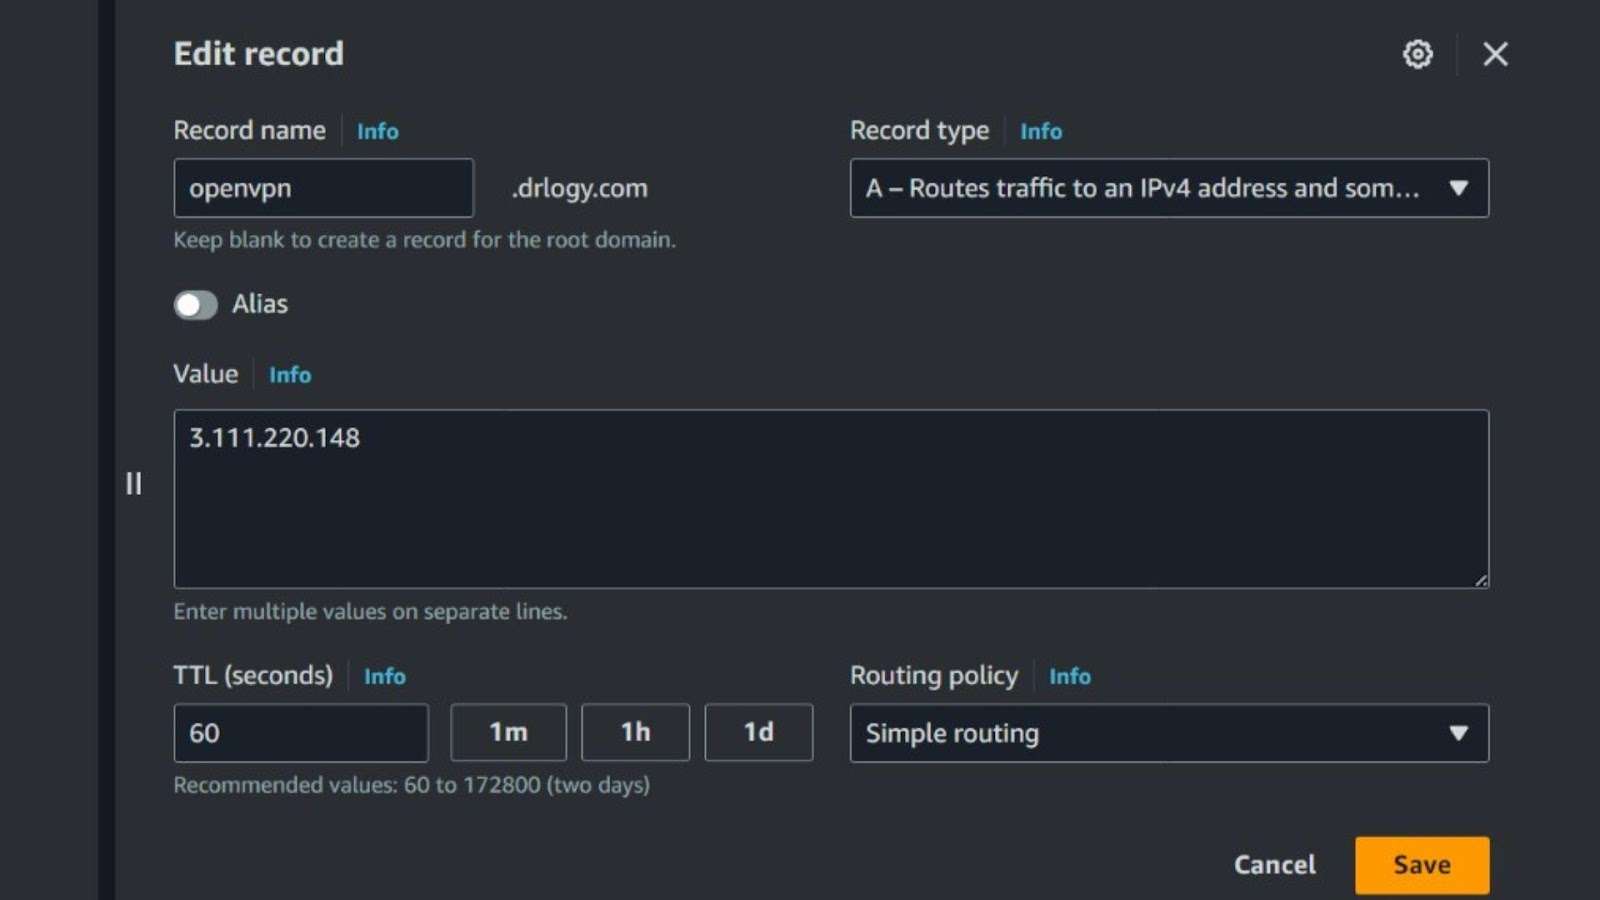
Step 2: DNS Configuration
Ensure your DNS A records at your domain registrar point to your server’s public IP address, aligning your domain with your server.
Step 3: Run Certbot
Execute Certbot to obtain a certificate:
| sudo certbot certonly |
Select the ‘standalone’ option, provide an email address, and specify your domain name (e.g., vpn.yourdomain.com).
Step 4: Apply the Certificate to OpenVPN
With the certificate obtained, apply it to your OpenVPN server:
| sudo su /usr/local/openvpn_as/scripts/sacli –key “cs.priv_key” –value_file “/etc/letsencrypt/live/vpn.yourdomain.com/privkey.pem” ConfigPut /usr/local/openvpn_as/scripts/sacli –key “cs.cert” –value_file “/etc/letsencrypt/live/vpn.yourdomain.com/cert.pem” ConfigPut /usr/local/openvpn_as/scripts/sacli –key “cs.ca_bundle” –value_file “/etc/letsencrypt/live/vpn.yourdomain.com/chain.pem” ConfigPut /usr/local/openvpn_as/scripts/sacli start |
This process applies the private key, certificate, and CA bundle to your server.
Step 5: Restart OpenVPN Access Server
Restart the OpenVPN Access Server to ensure all changes take effect:
| sudo service openvpnas restart |
Step 6: Verify the Installation
Navigate to https://vpn.yourdomain.com:943/admin in a web browser to confirm the SSL/TLS certificate is functioning correctly.
Optional: Configuring Nginx for HTTP to HTTPS Redirect
If your OpenVPN server doesn’t already redirect HTTP traffic to HTTPS, installing and configuring Nginx can automate this process:
- Install Nginx and adjust firewall settings:
| sudo apt update && sudo apt install nginx |
| sudo systemctl start nginx && sudo systemctl enable nginx |
sudo ufw allow ‘Nginx Full’
- Configure Nginx for HTTP to HTTPS redirect by creating a new server block:
nginx
| server { listen 80; server_name vpn.yourdomain.com; return 301 https://$server_name$request_uri; } |
- Enable the configuration, test for syntax errors, and restart Nginx:
| sudo ln -s /etc/nginx/sites-available/openvpn /etc/nginx/sites-enabled/ sudo nginx -t sudo systemctl restart nginx |
- Verify the setup by accessing your domain over HTTP and confirming the redirect to HTTPS.
Conclusion
Securing your OpenVPN Access Server with Let’s Encrypt certificates is a critical step in protecting your VPN traffic and ensuring that your communications remain confidential and authenticated. By following the steps outlined above, you can easily enhance the security of your VPN’s web interface, providing peace of mind for you and your users. Remember, security is an ongoing process, and keeping your server and software up to date is key to protecting your infrastructure.