Managing databases efficiently is crucial for any web application’s success. phpMyAdmin offers a user-friendly web interface for handling MySQL databases, making it a popular choice among developers. When your database is hosted on Amazon RDS, integrating phpMyAdmin can significantly streamline your database management tasks. This blog post guides you through setting up phpMyAdmin on an EC2 instance to manage an RDS database, assuming you’re working with a Linux-based EC2 instance and a MySQL-compatible RDS instance.
Table Of Content
- Step 1: Update Your EC2 Instance
- Step 2: Install Apache And PHP
- Step 3: Configure Apache for PhpMyAdmin
- Step 4: Configure PhpMyAdmin
- Step 5: Restart Apache
- Step 6: Access PhpMyAdmin
- Conclusion
Importance of Using phpMyAdmin with RDS
The combination of phpMyAdmin and Amazon RDS provides a powerful and flexible environment for managing your databases. phpMyAdmin simplifies complex database tasks with its intuitive web interface, allowing for easy management of tables, columns, and relationships. Meanwhile, Amazon RDS takes care of database provisioning, patching, and backups, offering scalability and reliability. This setup is ideal for developers who need a convenient way to interact with their databases without the complexity of direct command-line tools.
Prerequisites
Before starting, ensure you have the following:
- EC2 Instance: Running a Linux distribution such as Ubuntu or Amazon Linux.
- RDS Instance: A MySQL-compatible RDS instance up and running.
- Security Groups: Configured to allow HTTP/HTTPS (for web access) and MySQL traffic between your EC2 instance and RDS database.
Step-by-Step Guide
Step 1: Update Your EC2 Instance
First, connect to your EC2 instance via SSH. Update the package lists to ensure you have the latest versions available:
- For Ubuntu/Debian:
sudo apt update
- For Amazon Linux/RedHat:
sudo yum update
Step 2: Install Apache and PHP
Install the Apache web server and PHP, along with the PHP MySQL extension:
- Ubuntu/Debian:
sudo apt install apache2 php php-mysql
- Amazon Linux/RedHat:
sudo yum install httpd php php-mysql
Ensure Apache starts on boot:
Ubuntu/Debian:
sudo systemctl start apache2 && sudo systemctl enable apache2
- Amazon Linux/RedHat:
| sudo systemctl start httpd && sudo systemctl enable httpd Step 3: Install phpMyAdmin |
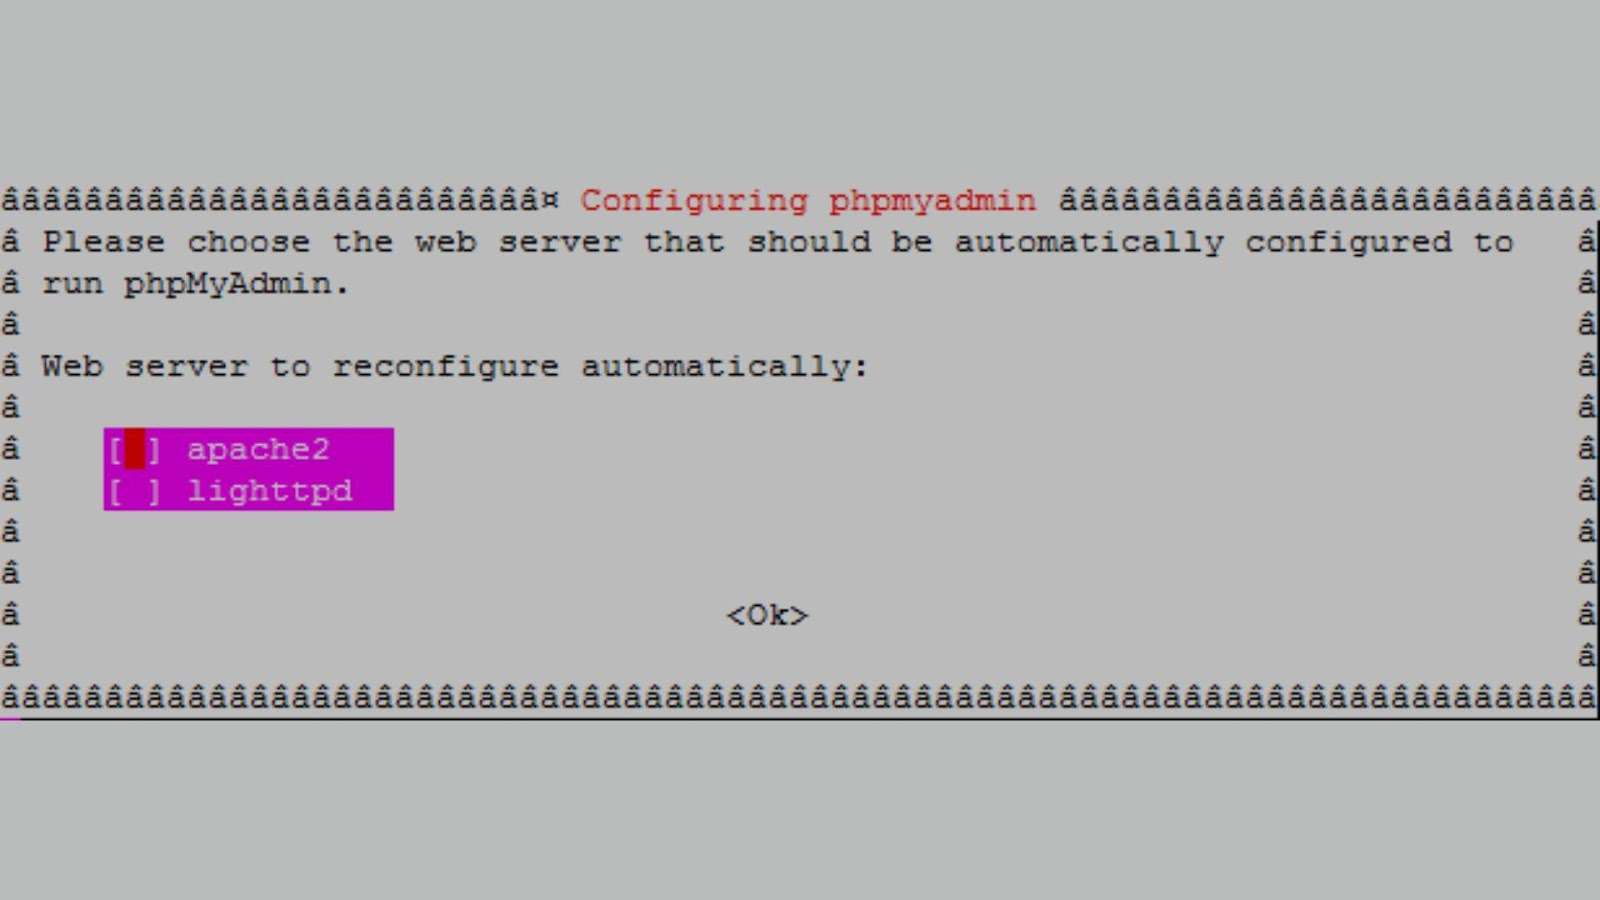
- Ubuntu/Debian:
sudo apt install phpmyadmin
- Amazon Linux/RedHat:
Manually download and install phpMyAdmin from its website.
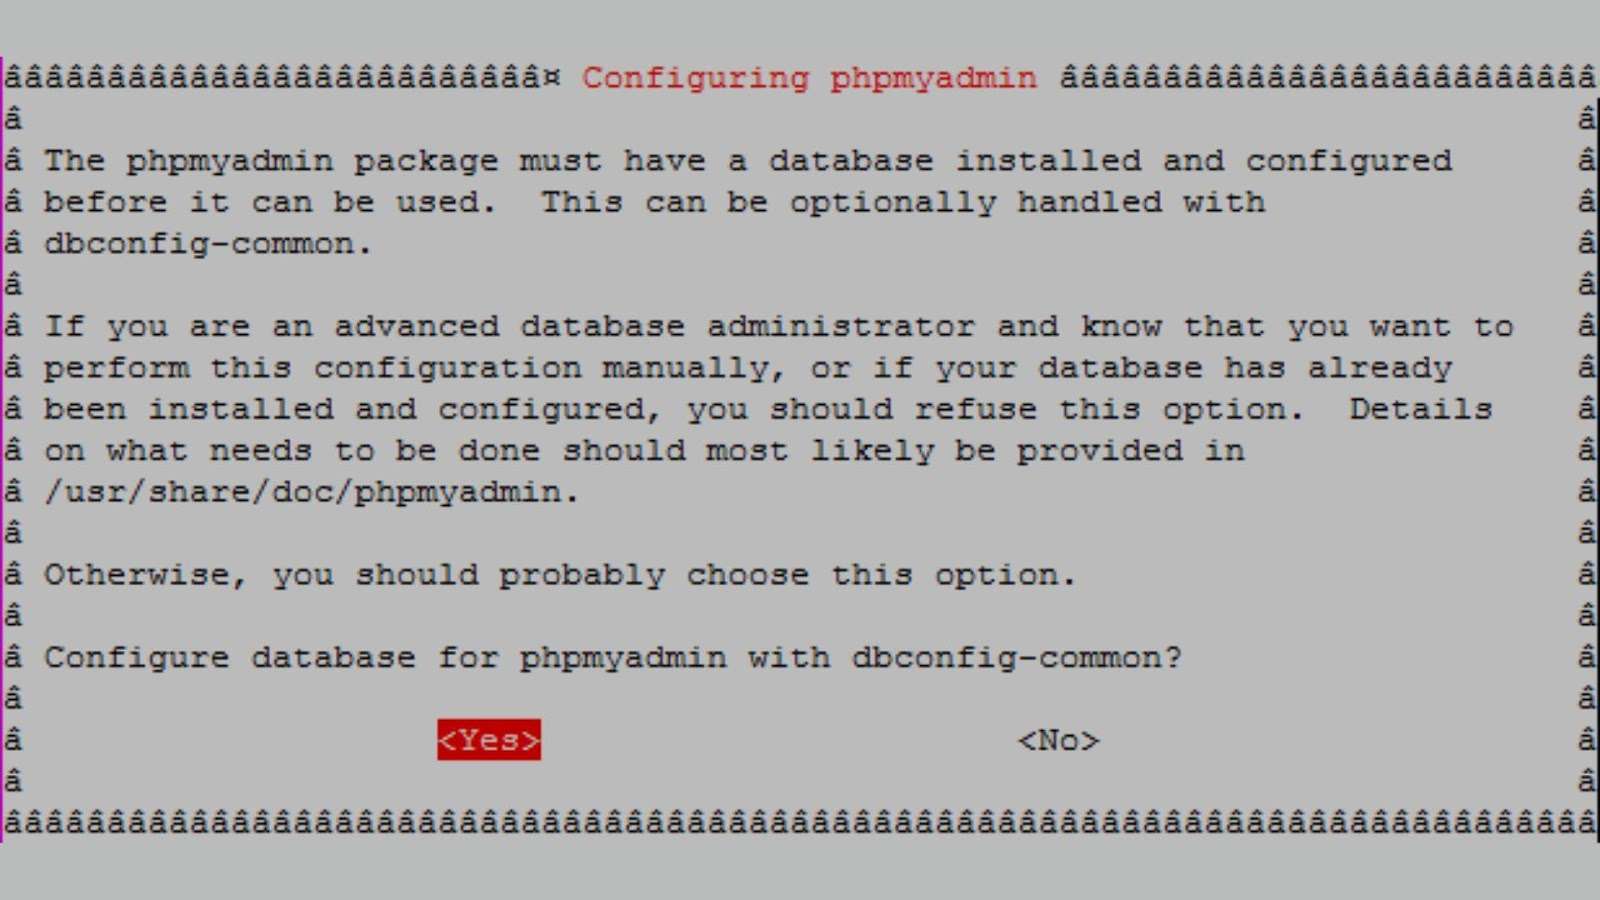
Select Apache as the web server during installation. Skip the database configuration step since you’ll be connecting to an RDS instance.
Step 4: Configure Apache for phpMyAdmin
Link phpMyAdmin to the web directory:
| sudo ln -s /usr/share/phpmyadmin /var/www/html/phpmyadmin |
Step 5: Configure phpMyAdmin
Edit the config.inc.php file to set up the connection to your RDS database:
- Set the auth_type to ‘cookie’.
- Specify your RDS endpoint, username, and password.
- Use TCP/IP networking.
Step 6: Restart Apache
Apply the changes by restarting Apache:
- Ubuntu/Debian: sudo systemctl restart apache2
- Amazon Linux/RedHat: sudo systemctl restart httpd
Step 7: Access phpMyAdmin
Open your web browser and navigate to http://[your-ec2-instance-ip]/phpmyadmin. Log in with your RDS credentials to manage your database.
Conclusion
Integrating phpMyAdmin with Amazon RDS offers a convenient and powerful solution for database management. This setup allows developers to leverage the strengths of both services: the scalability and reliability of RDS with the user-friendly interface of phpMyAdmin. Following the steps outlined above, you can set up phpMyAdmin on an EC2 instance to manage your RDS databases efficiently, enhancing your productivity and simplifying database administration tasks.
Remember, while phpMyAdmin provides a great interface for managing your databases, always be mindful of security best practices, especially when dealing with sensitive data and public internet access.