
Deploying Android apps manually can be a time-consuming and error-prone process. From building release bundles to uploading them on the Play Store, every step adds friction. This is where automation changes the game. With GitHub Actions handling continuous integration and Fastlane managing builds and uploads, you can set up a seamless pipeline that delivers apps to Google Play automatically.
In this blog, we’ll walk through how to configure GitHub Actions and Fastlane for Android, so you can save time, reduce errors, and focus more on building features instead of worrying about deployments.
When I first built my Android pipeline a few months back, it felt like a breakthrough. No more manual uploads to the Play Store, no more missed version codes, just a smooth flow from code commit → pipeline → app on Google Play.
Now, I want to share that journey so you can set up your own pipeline too. By the end of this blog, you’ll know how to build and release Android apps automatically using GitHub Actions and Fastlane.
Why Automate Android Deployments?
Releasing an app manually is time-consuming. You build the bundle, sign it, upload it, and manage versions every time. Automation helps you:
- Save time with repeatable builds.
- Reduce human errors.
- Ship faster and more often.
That’s where Fastlane and GitHub Actions come together. Fastlane takes care of building and uploading, while GitHub Actions runs it automatically on every push.
Prerequisites
Before you begin, make sure you have:
- A Google Cloud Project with API access enabled.
- Google Play Console access (with a service account created).
- Ruby and Bundler are installed.
- Node.js installed.
- Fastlane installed (gem install fastlane).
- An Android app project in a GitHub repository.
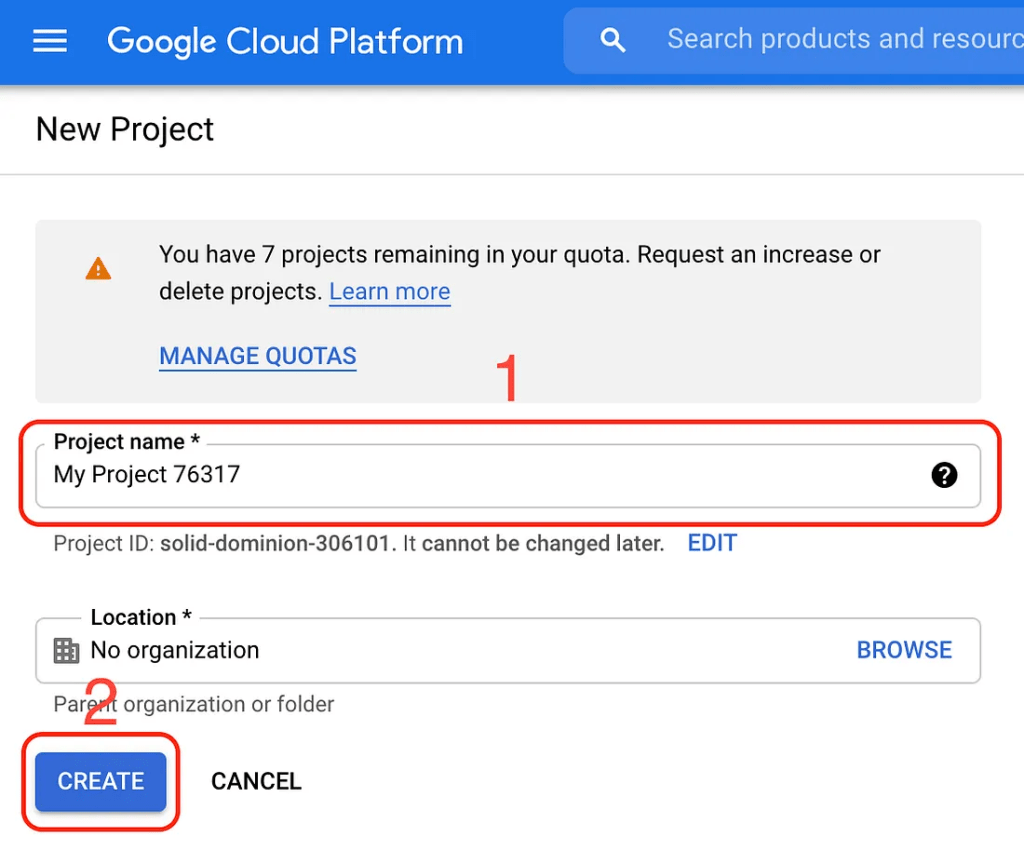
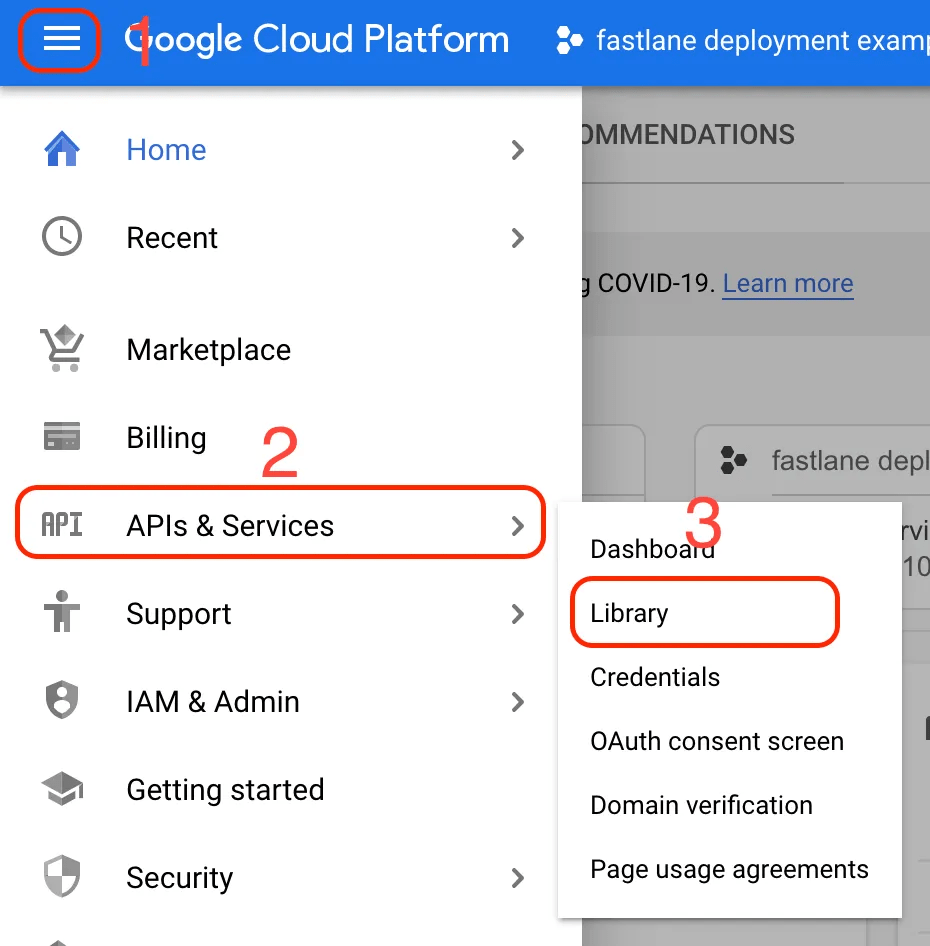
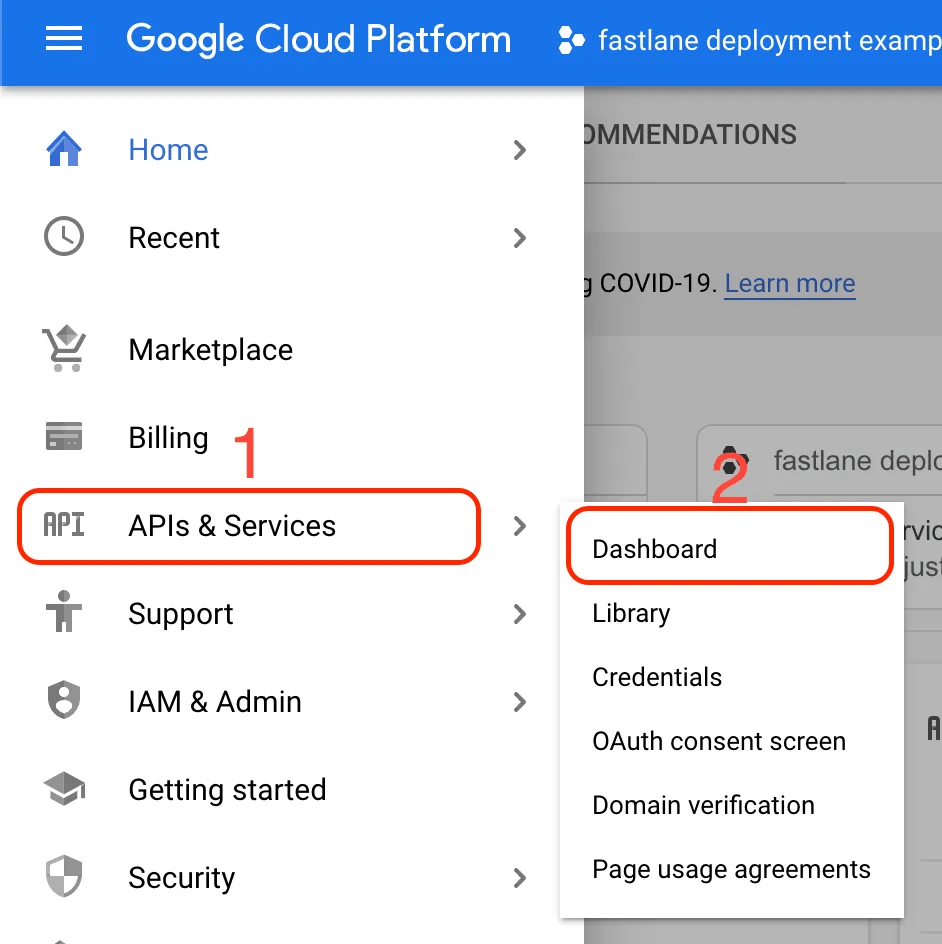
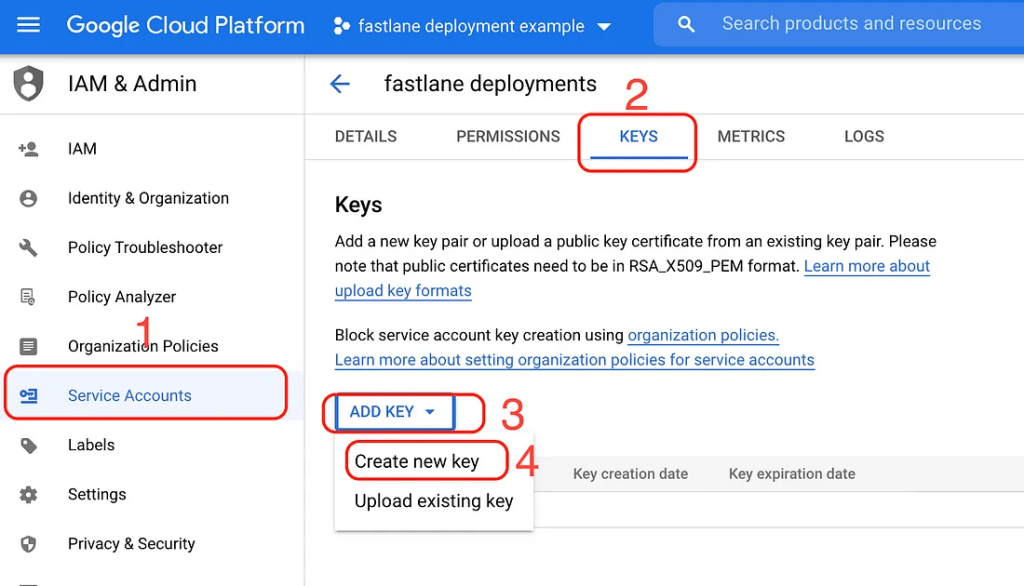
Step 1: Set Up Google Cloud and Service Account
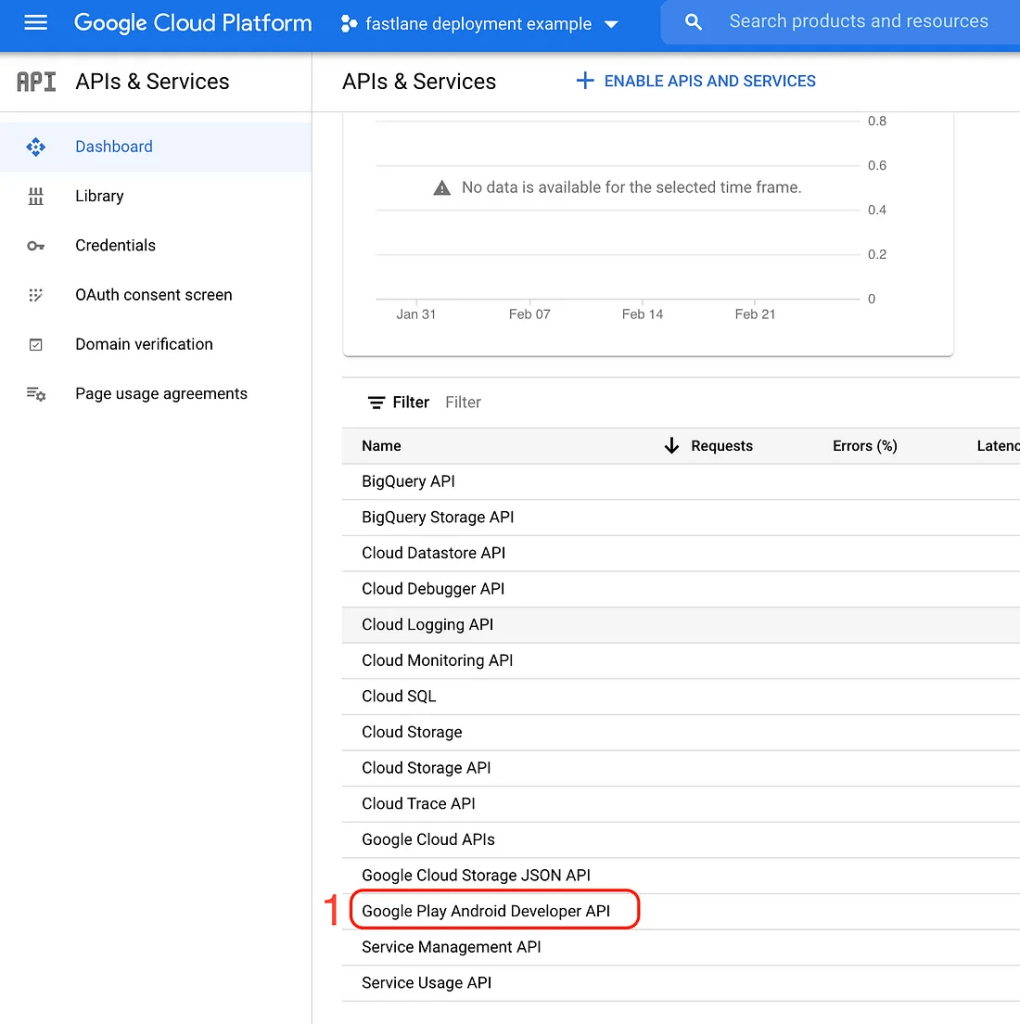
- Go to the Google Cloud Console → APIs & Services → Library.
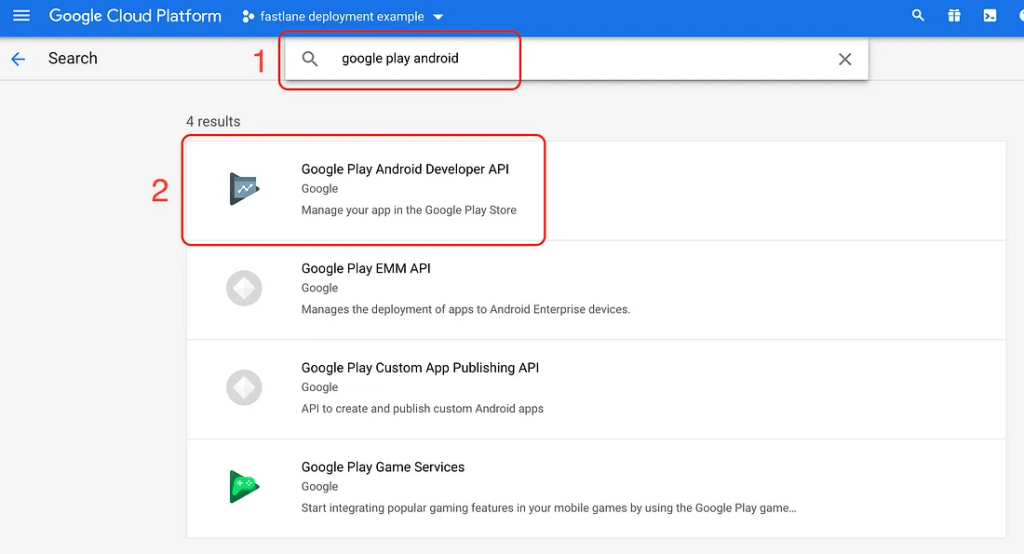
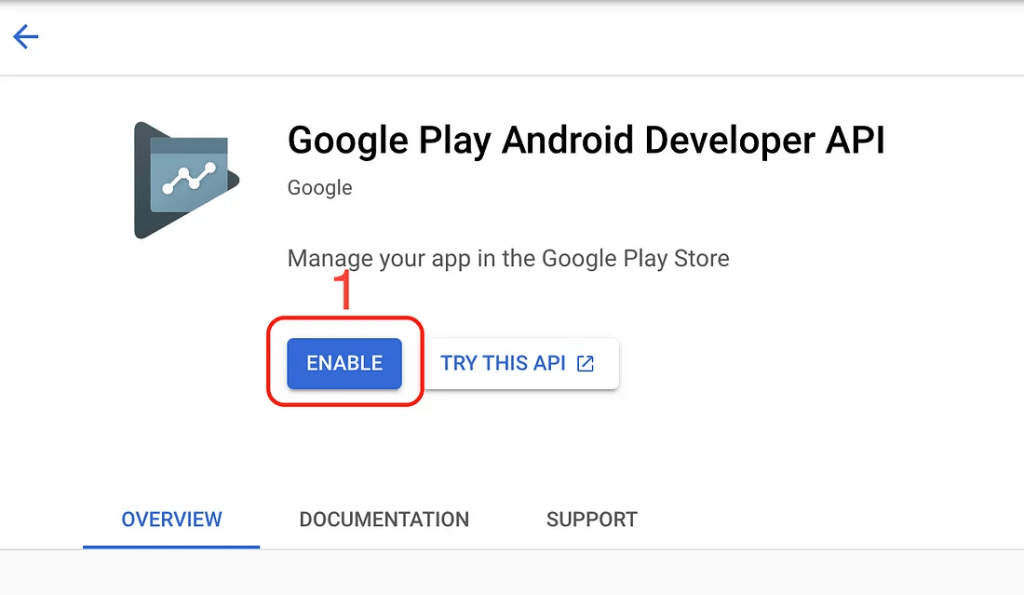
- Search for Google Play Android Developer API and enable it.
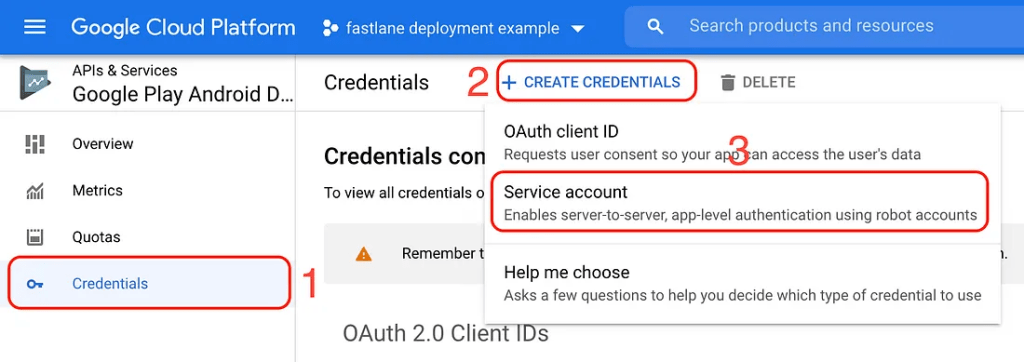
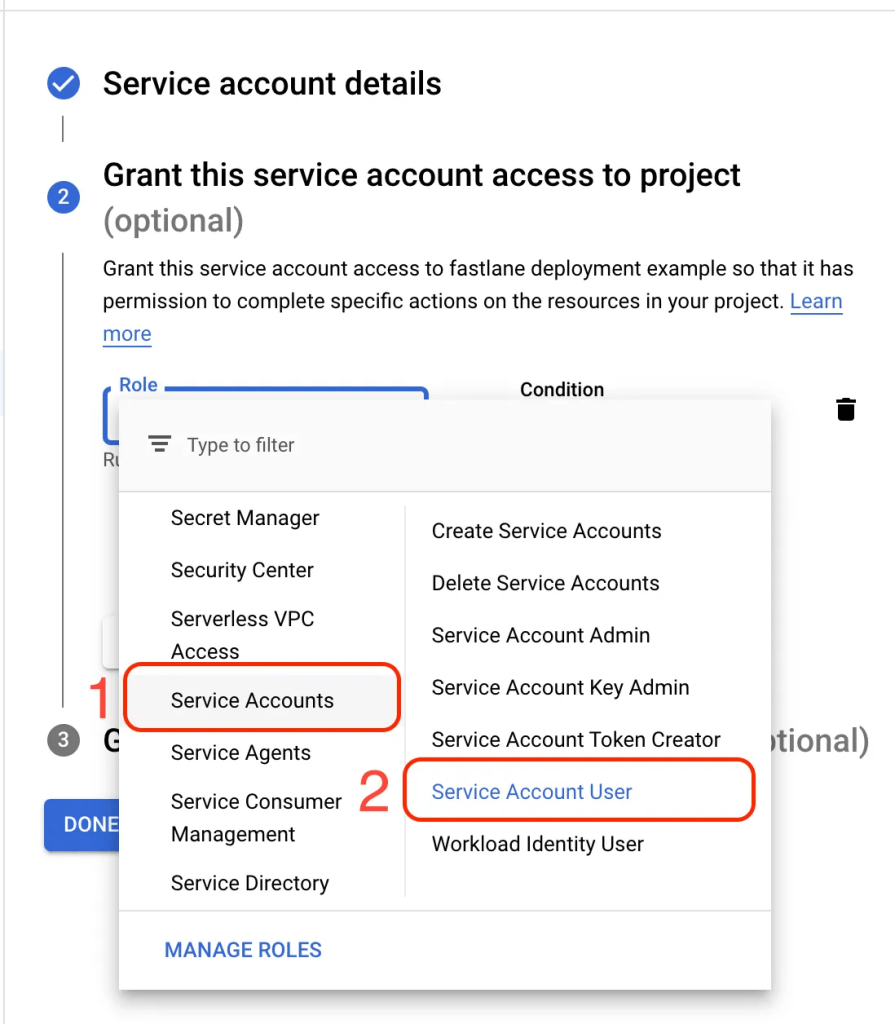
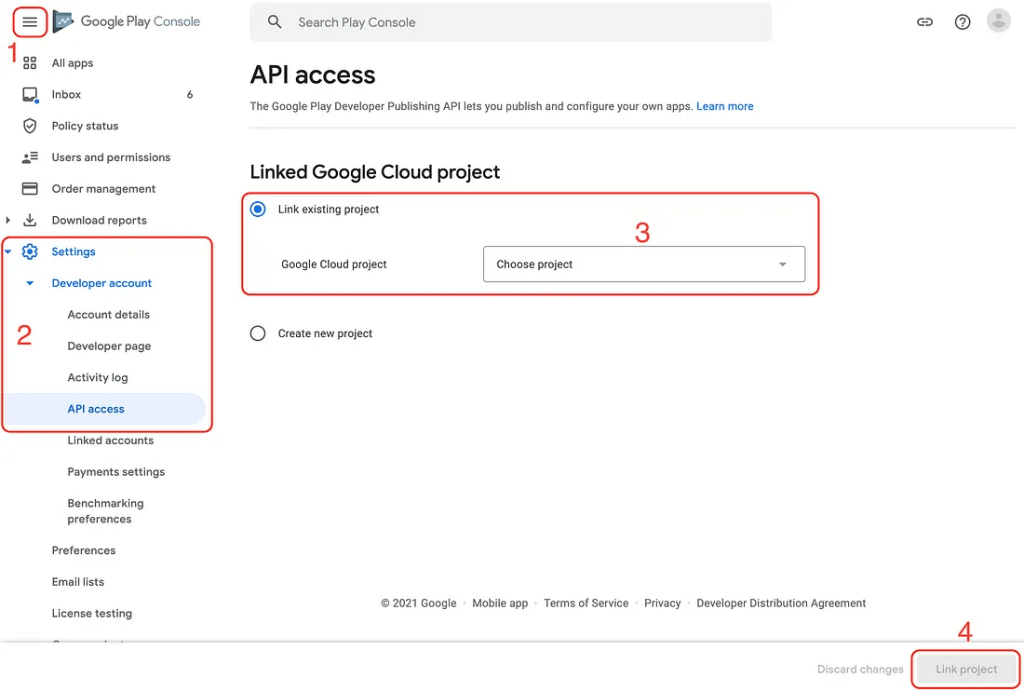
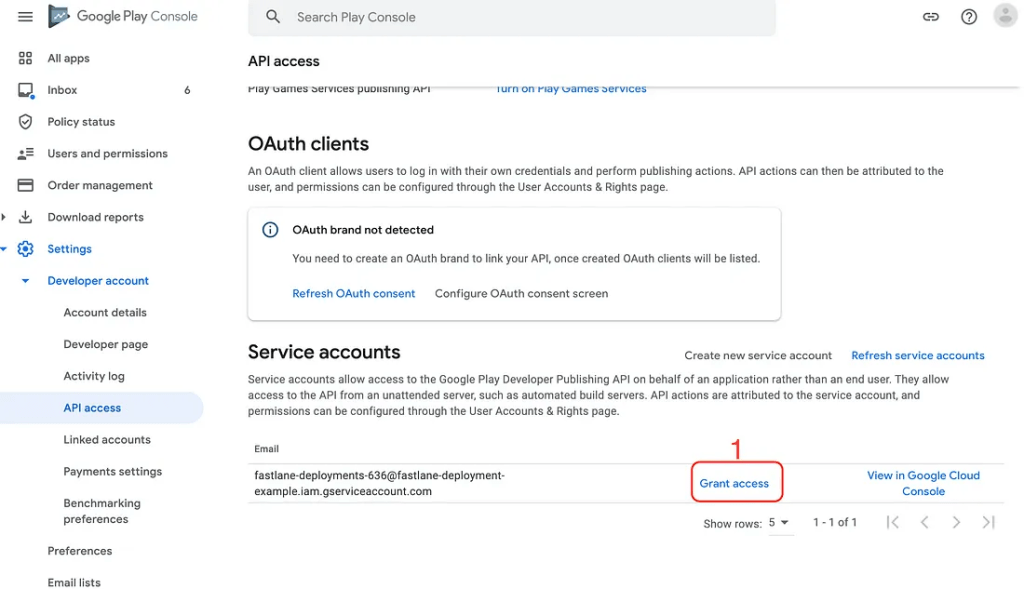
- In Google Play Console, go to Settings → API Access.
- Create a Service Account and download the JSON key file.
Rename it to google-service-account-key.json and keep it safe (add to .gitignore).

Step 2: Initialize Fastlane
In your Android project directory:
bundle exec fastlane init
This creates a fastlane/ folder with two important files:
- Appfile → holds your package name and JSON key path.
- Fastfile → defines your deployment steps (called lanes).
Example configuration:
| # fastlane/Fastfiledefault_platform(:android) platform :android do desc “Build and upload to the Internal test track” lane :internal do # 1) Build a release bundle gradle( task: “bundle”, build_type: “Release” # uses ./gradlew bundleRelease ) # 2) Upload the AAB to Google Play (Internal track) upload_to_play_store( aab: “app/build/outputs/bundle/release/app-release.aab”, track: “internal”, skip_upload_images: true, skip_upload_screenshots: true ) endend |
This lane builds your app and uploads it straight to the beta track on Play Store.
Step 3: Verify the Setup
Run this command to check your service account:
| bundle exec fastlane run validate_play_store_json_key \ json_key:google-service-account-key.json |
If it passes, you’re ready to deploy!
Step 4: Create GitHub Actions Workflow
Inside your repo, create a new file:
.github/workflows/android-deployment.yaml
| name: Deploy App CI CD on: push: branches: [ master ] jobs: build: runs-on: ubuntu-latest steps: – name: Checkout uses: actions/checkout@v2 – name: set up JDK 1.8 uses: actions/setup-java@v1 with: java-version: 1.8 – name: Grant rights run: chmod +x build.gradle – name: Build with Gradle id: build run: ./gradlew build – name: Build Release AAB id: buildRelease run: ./gradlew bundleRelease – name: Sign AAB id: sign uses: r0adkll/sign-android-release@v1 with: releaseDirectory: app/build/outputs/bundle/release signingKeyBase64: ${{ secrets.SIGNING_KEY }} alias: ${{ secrets.ALIAS }} keyStorePassword: ${{ secrets.KEY_STORE_PASSWORD }} keyPassword: ${{ secrets.KEY_PASSWORD }} – name: Create service_account.json id: createServiceAccount run: echo ‘${{ secrets.SERVICE_ACCOUNT_JSON }}’ > service_account.json – name: Deploy to Play Store (BETA) id: deploy uses: r0adkll/upload-google-play@v1 with: serviceAccountJson: service_account.json packageName: com.package releaseFile: app/build/outputs/bundle/release/app-release.aab track: beta whatsNewDirectory: whatsnew/ |
Step 5: Add Secrets in GitHub
In your repo → Settings → Secrets and variables → Actions:
- GOOGLE_SERVICE_ACCOUNT_KEY → entire JSON content
- ANDROID_SIGNING_KEY → your keystore, encoded (see below)
- ANDROID_SIGNING_KEY_PASSPHRASE → passphrase used to encrypt/decrypt the keystore
- (If you sign with Gradle, also add KEY_ALIAS, KEY_STORE_PASSWORD, KEY_PASSWORD)
How It All Fits Together
Here’s the flow:
- You push code to GitHub.
- GitHub Actions runs the workflow.
- Fastlane builds the app bundle.
- The bundle is signed using your keystore.
- Fastlane uploads the signed bundle to the Google Play Console.
Your app is now on the Play Store without you lifting a finger.
Key Takeaways
- Fastlane makes Android deployments painless.
- GitHub Actions turns deployments into a repeatable, automated process.
- With both combined, you can move from manual publishing to a true CI/CD flow.
Final Words
When I first set this up, it felt complicated , service accounts, signing keys, Fastfile… but once it clicked, I realized how much time and headache automation saves.
If you’ve been manually uploading your app to Google Play, now is the time to stop. With GitHub Actions and Fastlane, you can automate the entire release process and focus on what matters most: building great apps.